Once all the ingredients are prepped, this hearty, beef-based recipe can be put together in one pot like a Dutch Oven. There’s no shortage of flavor OR leftovers with this recipe, which makes it perfect for turning the leftovers into a freeze-dried backpacking meal after dinner.
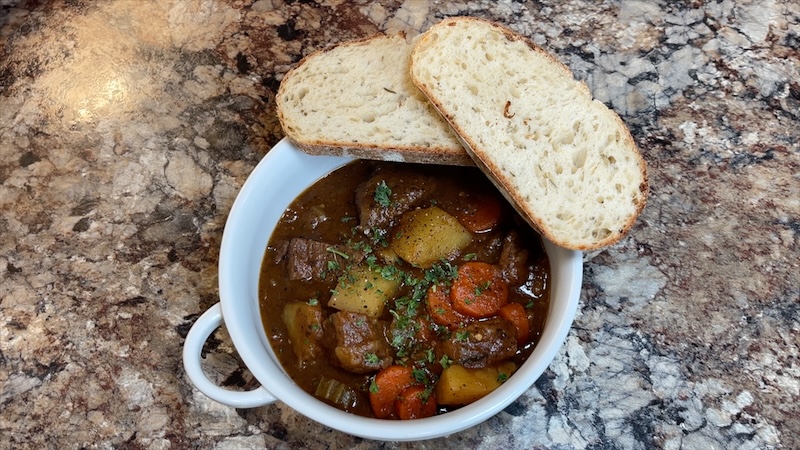
Beef Stew | Freeze-Dried Backpacking Meal Recipe
Ingredients
2 lbs Beef Chuck Roast
1 tbsp salt
2 tbsp Worcestershire sauce
4 tbsp flour
2 tbsp olive oil
1 yellow onion, chopped
3 celery stalks, chopped
4 garlic cloves, minced
Italian Seasoning
Garlic Powder
2 tbsp tomato paste
32 oz beef broth
2 springs fresh rosemary
4 carrots, sliced
4 yellow potatoes, quartered
Parsley
Cooking Instructions
Cube the 2 lbs of Beef Chuck Roast. Season with 1 tbsp of salt, Worcestershire and flour to coat all the beef.
In a Dutch Oven, heat 2 tbsp of olive oil on medium high heat and sear the beef for a few minutes on each side to form a crust. You will more than likely have to sear the beef half at a time in order to not overcrowd the pot.
Remove the beef and add another tbsp of oil, chopped onion, chopped celery and minced garlic. Cook on low heat for a few minutes and then add a sprinkle of Italian Seasoning, garlic powder and tomato paste. Stir and cook for a few minutes before adding the beef broth. Add beef back into the pot along with rosemary and fresh cracked pepper. Stir, cover with a lid and let simmer for 30 minutes.
Add sliced carrots and potatoes. Stir, cover and let simmer for an hour.
Before serving, top with fresh parsley.
Makes 6 servings
1 Serving = 2 Cups
Freeze-Drying Instructions
On a freeze dryer tray, add two cups of Beef Stew into a thin layer and spread it evenly over the tray
Load the trays into the freeze dryer, start the batch and wait anywhere from 20 to 24 hours for the batch to be complete.
After the batch has been completed, remove the food trays from the freeze dryer and package up each meal into a single serving bag. 1 Serving = 2 Cups of Beef Stew
Vacuum seal each bag to help preserve freshness and prevent spoilage and then store in a dark, cool place.
Weight Before Freeze Drying: 18.2 ounces
Weight After Freeze Drying: 4.3 ounces
I use the Harvest Right Home Pro Freeze Dryer (Medium) with the Premier Industrial Pump. Click here for more details about my freeze dryer.
Rehydrating in the Backcountry
- Transfer the food into a food safe container that can withstand boiling water like a mylar bag, Stasher bag or a quart-sized Ziploc Freezer bag
- Boil water
- Add just enough water to cover the food inside the bag. I don’t have exact measurements. I usually just eyeball this for each meal. When adding water, less is more to avoid the meal getting too soupy.
- Stir and close the bag
- Add food bag into an insulated food pouch or food cozy
- Let food rehydrate for 10-12 minutes
- Remove from the insulated food pouch (of food cozy) and stir
- Serve and enjoy!
Serving Size: 2 cups
707 calories per serving
39 grams of protein
Cost Per Serving: $6.00
Recipe makes 6 servings
GROCERY STORE BACKPACKING FOOD | MORE Cheap & Easy DIY Freeze-Dried Backpacking Meal Ideas
Learn how to make your own backpacking meals with some of other favorite grocery store backpacking meal recipes:
Beef Stroganoff
Chicken & Dumplings
Biscuits & Gravy (with Homemade Biscuits)
Chili & Cornbread
Hamburger Pie
Chicken Fajitas & Guacamole
Corned Beef & Cabbage
DISCLAIMER: This post and video contain affiliate links, which means that if you click on one of the product links, I’ll receive a small commission at no extra cost to you. This helps support my blog, The Hungry Hiker and allows me to continue to create content for you free of charge. Thank you for your support!
1 Comment on Beef Stew | Freeze-Dried Backpacking Meal Recipe