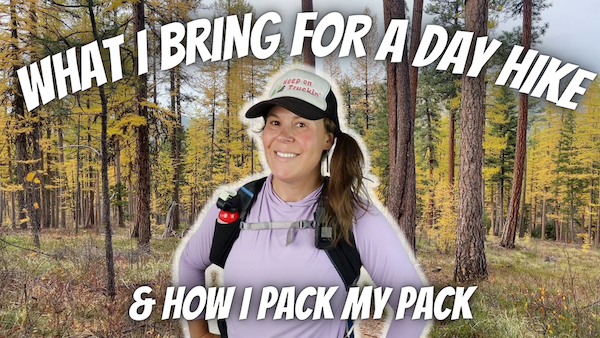
Getting ready to plan your next day hike, but have no idea what hiking gear you’ll need or know what to wear for you hike? I’m going to share with you all of the hiking gear I bring for a day hike, the clothes I hike in, explain how I pack my pack and walk you through how I plan each of my day hikes.
I’ve been getting a lot of questions about the gear lately, both for day hikes and overnight backpacking trips. This post will be focused on day hiking so if you’re also curious about my favorite gear I’ve been using this year for my backpacking trips, you’ll want to check this post out.
How I Prepare For A Day Hike
Before I talk about the hiking gear I use, I think it’s important to talk about how I plan each of my day hikes. Trip planning can be overwhelming and often times leave a lot of people not knowing where to start with the whole planning process.
Here’s how I plan each of my day hikes along with the resources I love using:
Step 1: Decide Where To Go
First, I start by figuring out where I want to go. One of my favorite trip planning tools to use is onX Backcountry, both on desktop and on my phone.
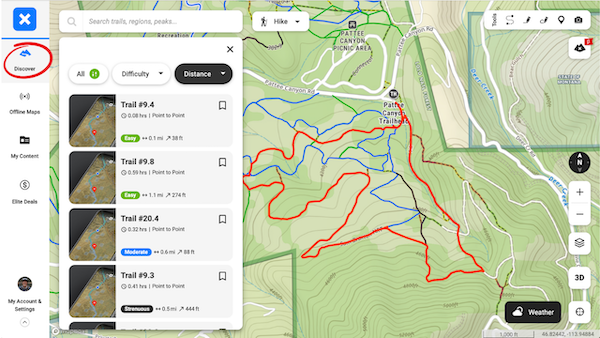
Using the Discover tab in onX Backcountry, you can easily find nearby hiking trails searching by location, Difficulty rating and Distance.
How To Use the Discover Tab to Find Nearby Trails:
Click on any trail and you’ll get a trail overview which includes the elevation profile for the trail, difficulty rating, total mileage, elevation gain and loss, route type and a description of the trail.
Step 2: Check the Current Conditions
While I’m trying to decide on which trail to hike, I’m also researching conditions like trail conditions, the current weather forecast for the area and road conditions getting to and from the trailhead.
When it comes to planning a hike, knowledge is power! Having an idea of what the current road conditions, conditions of the trail you want to go hike and the current weather forecast for the area ahead of time can be super helpful when trying to decide what kind of gear you want to pack for a hike.
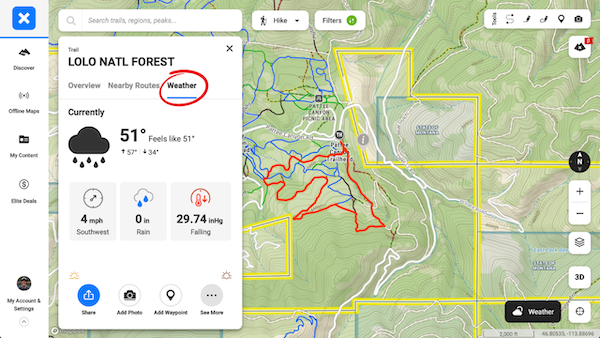
There’s an option to check the weather forecast for the area you want to go hiking in inside the onX Backcountry app.
How to Check the Weather:
Under the Weather tab for any trail, you can get the current hourly weather forecast for the area along with the 7-day forecast for the area. I typically will check the weather forecast a couple of days before my hike, the day before my hike and even in the morning before I head out to the trailhead.
Click Here to get 20% off your purchase of onX Backcountry OR start a free 14-day trial of onX Backcountry Elite by using promo code “HungryHiker”
Step 3: Read Current Trail Reports
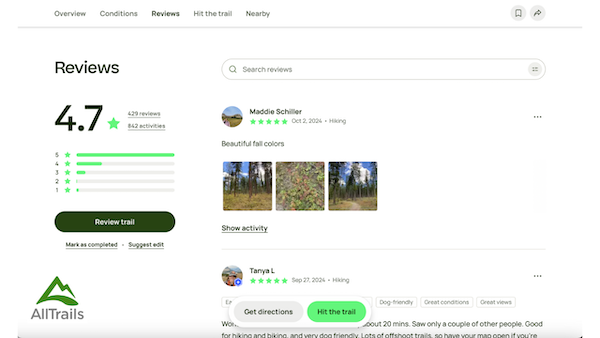
There’s also an option to check for trip reports written by other onX Backcountry users under the Trail Overview. If there aren’t any current trip reports for the trail I want to hike, I’ll use AllTrails. AllTrails is another resource I like to use when gathering real-time trail information.
Even though onX Backcountry is my favorite resource to use for on-trail navigation, AllTrails will often have current reviews or trip reports that are written by other users, which can include real-time trail and road condition information. Having this information is helpful when deciding if this is a trail I want to hike right now or not.
Step 4: Create A Route & Download the Map
Once I’ve decided on the trail I’m going to hike, the next thing I do is plan out my route. In onX Backcountry, I’ll create a route for my hike and download the route and map of the area onto my phone inside the app.
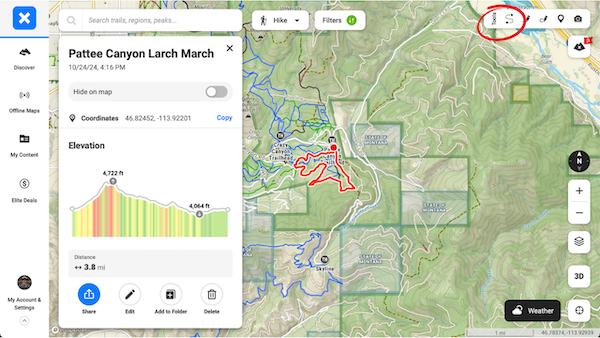
This way if I lose cell and WiFi service when I get to the trailhead, I’ll still have a map of the area along with my route that I can follow while I’m out there. Having a map and my route downloaded on my phone helps me from getting lost when I’m out on the trail.
Step 5: Tell Someone When & Where I’m Going
Since most of the day hiking I do is solo, I always make sure I tell someone else like a friend or family member who’s not going with me, where I’m going, my expected return time and share my route with them. This way if something happens while I’m out there, someone else will know if I don’t come back home and will send local authorities to come looking for me.
Step 6: Pack My Day Hiking Gear
Now that I know which trail I’m going to hike, have an idea of what the current trail and road conditions are and have my route created and map downloaded on my phone, I’ll then start packing for my hike with all of the appropriate gear, food and water I’ll need for the season, terrain and forecasted weather.
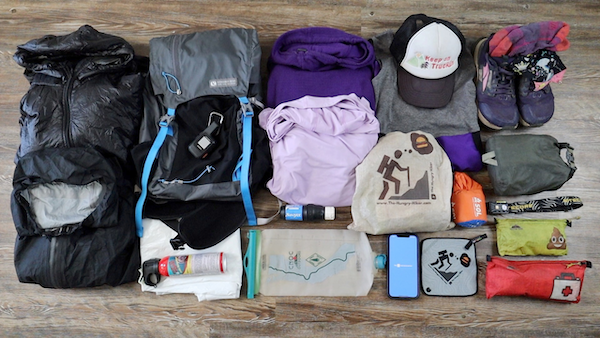
PRO TIP: I like to pack my pack the night before and leave everything I’ll need for my hike by the door. This way I don’t have to waste time in the morning looking for anything. I can just brush my teeth, get dressed, eat breakfast, put my shoes on and head out to the trailhead. I also like to to fill up my car with gas the day before. This is just one less thing to worry about in the morning.
Click Here for more tips and resources you can use to plan your next day hike.
What I Bring For A Day Hike
Satellite Messenger
As someone who does a fair amount of hiking solo, one piece of gear I never hike without is a satellite messenger. I use the Garmin inReach Mini 2. A satellite messenger means I have two-way communication whenever I’m out of cell and WiFi service with friends and family at home to keep them updated throughout my hike. I also have two-way messaging with search and rescue in the event of an emergency.
The inReach Mini 2 also has a tracking option that I can turn on to retrace my steps if I get turned around. Friends and family can always know where I’m at by following me along my hike using the MapShare feature, if I’ve set this up ahead of time before getting out on trail. I also love that I can check the current weather for the area I’m at through my inReach while I’m out on trail.
For the satellite messenger to work effectively, it needs to have a clear view of the sky to access the satellites. I like having my Garmin on my shoulder strap just so if I need to access in the event of an emergency, it’s easily accessible.
Pack & Fanny Pack
The pack I’ve been using for all of my day hikes this year is the Gossamer Gear Loris 25. This is a frameless, light pack which with the pack body, sitlight pad, weighs less than 20 ounces. The Loris has a 25-liter capacity and is perfect for using on any day hike.
Starting on the outside, there’s a large external mesh pocket which is similar to the pocket I love so much on the Gossamer Gear Mariposa 60. On the shoulder straps, there’s a small mesh pocket on each side, similar to a running vest. This is where I like to keep my bear spray because it makes it super accessible just in case I ever need to use it. There are two water bottle side pockets, one on each side. There’s a removable SitLight pad that sits along the backside of the pack so I don’t have to pack an additional sit pad for something to sit on whenever I stop for a break.
Inside the pack, there’s a hydration or laptop sleeve along with a zipper pocket. There’s also a zippered pock on the outside of the pack at the top.
I LOVE the over-the-top closure system, which makes loading, unloading and getting to the gear I need inside the pack really easy. If you’re someone who needs hip belt pockets, you can add a fast belt like I did for extra storage.
In addition to my pack, I also like to wear a fanny pack like the Thru Pack Summit Bum fanny pack on all of my day hikes. This is where I carry my wallet, phone, camera, extra snacks, car keys and of course The Hungry Hiker stickers for when people say hi and recognize me out on trail.
Worn Clothing
Let’s talk about the clothes I wear while hiking.
During the fall and winter when temperatures cool down quite a bit, I like to wear a pair of trekking pants for my day hikes. The rest of what I wear out on trail stays the same for what I wear backpacking during the warmer months:
- A Purple Rain Adventure dress
- A sun hoodie over my hiking dress
- A pair of good hiking socks like these from Darn Tough
- A pair of gaiters over my socks and shoes to help keep the dirt and debris out
- If it’s not wet and muddy out, I’ll wear a pair of trail runners to hike in
- A pair of sunglasses if it’s bright out and a trucker hat like my “Keep on Truckin” hat, which you can purchase on my website
Click Here for my complete day hiking gear list including links to where you can find each of these items online.
How I Pack My Pack
First, I start by lining the inside of my pack with a trash compactor bag for some rain protection to help keep all of my gear inside dry. Then I pack inside my pack:
- Extra layers of clothing like my puffy jacket, rain jacket and fleece
- Water Filtration System, which includes a water filter and a dirty water bag
- Repair/Tool/Toiletry Kit with a headlamp
- A First Aid Kit
- A Poop Kit
- All of the hiking snacks I plan on bringing with me for my hike inside a day-of food bag
The 10 Essentials
I can’t talk about hiking gear without talking about the 10 Essentials. The 10 Essentials are a list of 10 items every hiker should pack and bring with them when recreating outdoors, no matter how long they plan on being out on trail.
The 10 Essentials are designed to help you be prepared for the worst-case scenario, whether it’s having to deal with bad weather, getting injured, getting lost or needing to help another hiker in the event of an emergency.
The 10 Essentials include:
- I personally love using the onX Backcountry app on my phone
- Sun Protection like sunglasses, a sun hoodie, a hat and sunscreen
- Insulation like Extra Clothing, which for me is a puffy jacket, a fleece and an extra pair of socks
- Illumination, which in my pack is my headlamp
- First Aid Kit
- Fire, which can be a lighter, fire starter and/or waterproof storm matches
- Repair Kit and Tools, which would be anything you could use to repair your broken gear whole out on trail
- Extra Food. As the Hungry Hiker, I always carry extra snacks for all of my day hikes!
- Hydration, which means having enough drinking water along with a way to filter or treat additional water
- An Emergency Shelter. In my pack for all of my day hikes, I always carry an emergency bivy.
Carrying all of this stuff might seem excessive, but if you find yourself or another hiker in an emergency situation out on trail that delays you with getting back to the trailhead, you’ll be glad you have all of these items. Having the 10 Essentials can literally be the difference between surviving an unexpectant night out on trail or worse.
Knowing I have everything I’d need in order to be self-reliant in an emergency situation helps relieve a lot of stress, especially while I’m out on trail by myself. Even if I don’t use any of the 10 Essentials on a day hike, carrying all of this gear is a great way to continue training for the warm weather backpacking season while hiking during the shoulder and winter season.
If you want more details about each of the items mentioned in this post, check out my 2024 Day Hiking Gear List which include links on where you can find everything online.
Disclaimer: The-Hungry-Hiker.com is a participant in the Amazon Affiliate Links and AvantlInks Program, affiliate advertising programs designed to provide a means for sites to earn advertising fees by advertising and linking to Amazon.com and other affiliated sites at no cost to you. Please note, I only link to products and services I personally use and trust.

Most day hikers know the area, but if not try to call the ranger office. There may be trail closures and other information. The other thing I try to find out is road conditions for getting to the parking lot. If you have a family car roads can be rough. If it may rain; do not head down rough road.
Yes, calling the local ranger station to get current trail and road conditions is also a great idea! Getting to the trailhead parking lot might be difficult in certain seasons, so this is something worth looking into each time, before heading out on trail.