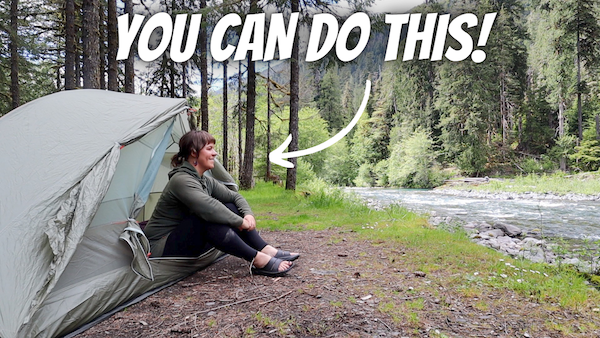
If you’ve been thinking about wanting to go solo backpacking, but for some reason can’t seem to get out of your own way to go, let me be the first to tell you that YOU GOT THIS!
This whole solo backpacking thing might look like it has always come easy for me. Trust me, it hasn’t. I didn’t always start off having a bunch of confidence in myself to just be able to pack up my pack and go backpacking alone.
It’s taken me a LOT of practice. A lot of work. Making a ton of mistakes. Going on a bunch of different backpacking trips, both by myself and with other people, before I was able to feel comfortable knowing how to plan and pack for whatever type of trip I wanted to go on.
Going backpacking by yourself doesn’t have to be scary or complicated. I promise. Here are 10 tips for planning your first solo backpacking trip:
#1: For Your First Solo Backpacking Trip, Start Small
Maybe the thought of putting on a heavy pack and hiking 10 miles down the trail just to set up camp for the night by yourself scares the crap out of you. I totally get that. This is why I recommend starting small when planning your first solo backpacking trip.
Start small. But what does that mean?
Start by getting comfortable with spending time by yourself outside. Take yourself on a short, solo day hike to see what it feels like to be out on trail alone.
Then when you’re ready to take it to the next level, go to an established car camping campground, set up your tent and sleep in it overnight. You’ll get the practice of sleeping in your tent by yourself and because there will most likely be other people around, you won’t feel so alone. And if things get uncomfortable or you’re just not feeling it, just remember that your car will be right there so you can pack up your camp, get in your car and go back home.
#2: For Your First Solo Backpacking Trip, Pick A Familiar Trail
For your first solo, overnight backpacking trip, pick a trail that’s familiar to you. This could be a trail that’s close to home with low mileage. Maybe even a trail that you’ve gone day hiking on before.
By visiting a familiar trail, you’ll help eliminate the fear of the unknown, making the whole idea of doing your first solo backpacking trip way less scary. I recommend choosing a popular, well-travelled trail. This way, you’re more likely to run into other hikers and backpackers while you’re out there by yourself.
If you really want to make sure other people will be out on trail with you, consider planning your trip over the weekend when there’s likely to be more people out on trail.
Something I highly recommend as a solo backpacker is to always hike at least 3 to 5 miles away from any trailhead, parking lot or road before setting up your camp for the night. This way, you’ll get far enough out there to enjoy yourself, get away from city life and feel accomplished while keeping the overall level of risk pretty low.
#3: Do Your Research
Something I do for ALL of my backpacking trips is research where I want to go. For your first solo trip, make a plan to do your own research. You’ll want to start by figuring out where you want to go. You can check out local guidebooks of the area you’re considering visiting.
You can look up hiking and backpacking Facebook Groups to get location ideas. If you already have a specific area or trail in mind, search out location-specific hiking and backpacking Facebook Groups to get more detailed trail information to start planning your trip.
Local trail associations and national park websites are also great resources to check out when trying to decide where to plan your trip. You can even reach out to a local ranger station for the area you want to go backpacking in to get more ideas.
Once you’ve figured out where you want to go, start becoming familiar with the rules and regulations for the area you’ll be backpacking in.
- Do you need a permit to camp?
- Are there designated tentsites or is dispersed camping allowed?
- Do you need to make a reservation for a tentsite or are the sites first come, first served?
- What are the requirements for food storage in the area?
- What are the requirements for waste management? Can you bury your poop? Will you need to use a wag bag and pack out your poop?
- Will you need a parking pass for your car at the trailhead?
- Is there a park fee required to get into the area?
You’ll also want to become familiar with the 7 Leave No Trace or “LNT” principles, which include:
- Planning ahead and preparing, just like what we’re doing right now
- Traveling and camping on durable surfaces
- Disposing of waste properly, which ultimately means whatever you pack in, you must pack out
- Leaving what you find
- Minimizing campfire impacts
- Respecting wildlife, like keeping your distance and being bear aware
- Being considerate of others
Then before leaving for your trip, you’ll want to check the conditions, which include:
- Current trail conditions
- Road conditions, not only the highway you plan on traveling on, but also the forest service road leading to the trailhead
- And the current weather forecast for the area you’ll be hiking in
- Potential wildlife in the area?
It also might be worthwhile to do some research to see what kind of wildlife you can expect to see in the area while you’re out on trail.
#4: Start Planning
After you’ve figured out where you want to go and have done all your research, then it’s time to start planning your trip. This means putting together an itinerary for your trip and creating routes for each day you’ll be out on trail.
You can use either a paper map or a GPS navigation system app like onX Backcountry to build a route, both for your entire trip and for each individual day you’ll be out on trail.
onX Backcountry is a GPS navigation app I use to access online and offline maps specially tailored for hiking and backpacking. I use onX Backcountry as one of my primary trip planning tools to search for nearby trails, create routes for my trip itinerary, find water sources and potential tentsites, download maps to use while my phone is offline, see what the elevation profile is for any given trail, check the current weather forecast for the area and get information on public land boundaries.
Then once I’m on trail and offline, I use onX Backcountry’s GPS functionality to help me from getting lost by showing me where my exact location is on my downloaded, offline map.
With the onX Backcountry Elite membership, you’ll get all of the same features as the Premium subscription, BUT you’ll also get a map overlay featuring Private and Public lands. This makes it super easy to find publicly accessible areas to go backpacking on without worrying about trespassing on private property.
CLICK HERE to get either 20% off your onX Backcountry Premium or Elite subscription OR can start a 14-day trial of onX Backcountry Elite for FREE.
When creating the routes for your trip, it’s worthwhile to note the total mileage and elevation profile for each day along with marking possible tentsites, water sources and landmarks you might want to see while you’re out there.
When putting together your Trip Itinerary, you’ll want to include important information like:
- Your planned route and the name of the trailhead you’ll be starting from
- The tentsites you plan on staying at during your trip
- Your start date and time for your trip.
- Your expected end date and time.
- The make, model, color and license plate number of your car and the location of where you plan on parking your car
- The name of the county you’ll be hiking in
- Information on how to contact local authorities in the area you plan on hiking in including local county search and rescue, the local sheriff’s office and the local ranger station
Before you leave for your trip, make sure to share your trip itinerary with someone at home whom you trust, who can also act as your emergency contact while you’re out on trail by yourself. And make sure to let your contact at home know once you’ve started your trip and also once you’ve reached the trailhead, completing your trip.
#5: Pack the Right Gear
When packing for an overnight backpacking trip, whether it’s your first solo trip or your next, always pack the right gear for the right conditions and terrain, which includes making sure you have the following systems with you:
- A Pack
- Shelter System
- Sleep System
- Water Filtration System
- Cooking System, which should also include what you’re going to properly store your food in at camp like a hard-sided bear canister or an Ursack
- A Repair/Tool/Toiletry Kit
- A Poop Kit
- First Aid Kit
- Electronics, which can include your smartphone, a camera, batteries, a satellite messenger and a way to charge all of the electronics you bring with you. I personally like using this lightweight NightCore power bank.
- Misc and Seasonal Gear, which will depend on your trip objective along with where and when you go for your backpacking trip. This can include a pair of trekking poles, microspikes, an ice axe, gaiters, a lightweight umbrella, rain gear, a pair of camp shoes and a bug repellent system like bug spray, a head net and even this nifty FlexTail Tiny Repeller.
- Your Packed Clothes
- Clothes You’ll Be Hiking in
CLICK HERE to learn more about each of these systems I pack for every backpacking trip.
#6: The 10 Essentials
As you’re packing your backpacking gear, you’ll also want to make sure to pack the 10 Essentials.
The 10 Essentials include:
- Navigation
- Illumination
- Shelter
- Extra Water
- Extra Food
- Extra Clothes
- Sun Protection
- Fire
- Knife and Gear Repair
- First Aid Kit
Having the 10 Essentials will help better prepare you for the worst-case scenario, just in case you have to spend more time out on trail than you had originally anticipated.
CLICK HERE to learn more about what the 10 Essentials are and why they’re so important to have with you whenever you’re out on trail.
#7: Bring Easy Food
For your first solo backpacking trip, keep meal planning to a minimum by only bringing easy food options. This could be anything from meals you only need boiling water to cook to no-cook options like meat, cheese and crackers, a sandwich or a ton of snacks.
#8: Practice Using Your Gear
It’s not enough to have the right backpacking gear for a trip. You’ll also want to know how to use it before getting out on trail.
I recommend setting aside some time to practice using and becoming more familiar with your gear before your first solo backpacking trip. Try setting up your tent in your yard. Practice packing your pack with all of your gear. Set up your sleep system, filter some water, wear the shoes you plan on hiking in. Set up your stove and boil of pot of water.
If you plan on spending a night by yourself in an established car camping campground, then this would be a perfect opportunity to practice using all of your gear. Set up your whole camp like you would if you were out on trail in the backcountry. Then when you’re done, make sure you also practice packing up all of your gear in your pack before putting it all in the car.
#9: Carry An Emergency Device
As someone who spends a fair amount of time hiking and backpacking out on trail by myself, I recommend carrying some sort of emergency device.
I always bring with me a Garmin inReach Mini 2, which is a lightweight, satellite messenger that allows me to have two-way messaging with the off-trail world like friends and family at home and even with emergency authorities in the event of an emergency, whenever I’m out of cell and WiFi service range.
Besides having two-way messaging capabilities with the outside world, I can also use my Garmin inReach to set up an online map for friends and family to follow me while I’m out on trail alone. I also have the ability to check the local weather forecast for the area I’m hiking in, which comes in really handy whenever the weather starts to change quickly up in the mountains when I’m out on trail by myself.
#10: Have Fun!
And most importantly, have fun while you’re out there. What’s the point of planning a backpacking trip if you’re not going to have any fun?
This is why I always bring a camera with me for all of my trips. I love documenting my solo backpacking adventures and then sharing them on my YouTube Channel.
You could also pack a couple distractions to entertain yourself while at camp like a book to read, music to listen to, a game to play or a journal to write or draw in. The more fun you have out there, the more likely you’ll want to go again and start planning your next trip.
Hopefully this has given you a few good ideas on how to start planning your first solo backpacking trip. Remember, YOU GOT THIS!
Disclaimer: The-Hungry-Hiker.com is a participant in the Amazon Affiliate Links and AvantlInks Program, affiliate advertising programs designed to provide a means for sites to earn advertising fees by advertising and linking to Amazon.com and other affiliated sites at no cost to you. Please note, I only link to products and services I personally use and trust.
1 Comment on 10 Tips for Planning Your First Solo Backpacking Trip