If you’re new to backpacking, the trip planning portion of any backpacking trip can be intimidating and confusing. I know as a beginner backpacker, I always felt overwhelmed with planning my trips because I often had no idea where to even start.
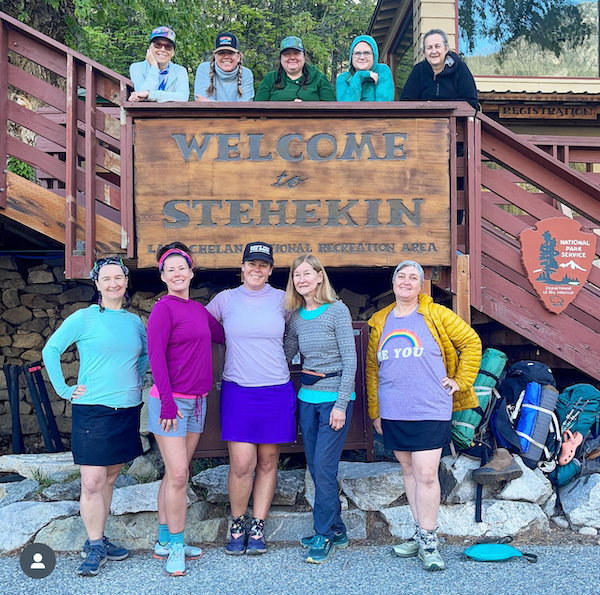
Recently I took a group of students from my online backpacking program for women, The Confident Solo Female Backpacker System, to hike the Chelan Lakeshore Trail in Washington State.
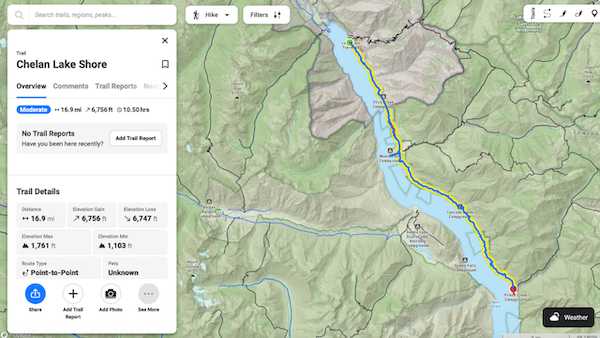
I’m going to walk you through my whole trip planning process of how I planned our 4 day/3 night group backpacking trip along the Chelan Lakeshore Trail using one of my favorite trip planning resources, onX Backcountry.
I’ll show you how I came up with our trip itinerary including our exact route, how we got to the trailhead, figured out where we’d camp each night and where the water sources would be along the trail.
Planning A Backpacking Trip on the Chelan Lakeshore Trail
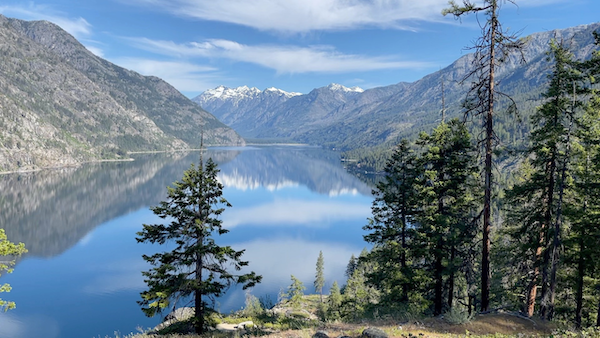
The Chelan Lakeshore Trail is perfect for an early season backpacking trip. First of all, the scenery is stunning. You’re surrounded by beautiful snow-capped peaks and a sapphire-blue lake, Lake Chelan, which is cold all year round.
The trail is usually dry and snow-free, the weather in May is usually pretty perfect, not too hot and not too cold and at this time of year, there’s tons of wildflowers all along the trail.
Since it was still considered early season while we were here on Mother’s Day Weekend, all of the campsites in town were free and available on a first come/first served basis. And if you’re into yummy food and delicious baked goods, the Stehekin Bakery is a must stop in town, once you reach Stehekin at the end of the trail.
Our Backpacking Trip Itinerary
Day 1:
We started our trip with a ferry ride from Field’s Point Landing, just outside of Chelan, Washington. We rode the ferry to Prince Creek, where we got off and set up camp.
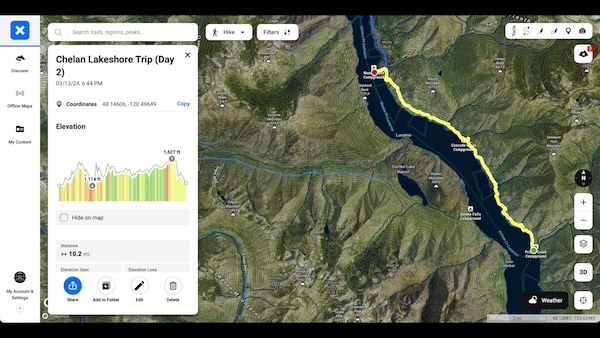
Day 2:
We started hiking early in the morning to help beat the heat and hiked 11 miles up the trail where we set up camp at Moore Point.
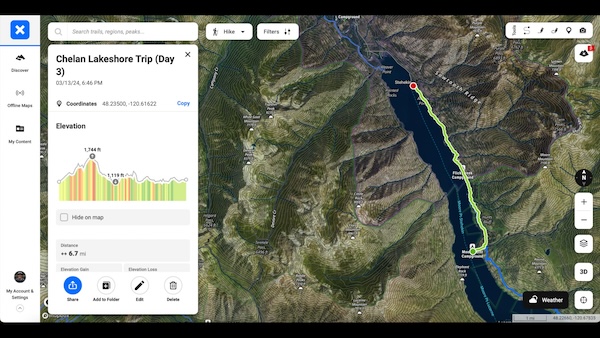
Day 3:
We hiked the remaining 7 miles into the little town of Stehekin, which is only accessible by foot, boat or plane. Once we reached Stehekin, we camped one night in town and made our way to the famous Stehekin bakery multiple times.
Day 4:
On our final day of the trip, we hopped on the ferry and rode it back to Field’s Point Landing where we’d officially end our trip.
The Chelan Lakeshore Trail is a total of 17 miles with 4,100 feet of elevation gain.
How Do I Plan an Overnight Backpacking Trip?
- How do I choose a destination?
- How do I put together an itinerary for my trip?
- And what are some of my favorite trip planning tips and resources I like to use when putting together my trips?
I pretty much use the same process for planning all of my backpacking trips, no matter where I’m going, whether I’m hiking along the Pacific Crest Trail, the John Muir Trail, the Wonderland Trail in Mount Rainier National Park, the Trans Catalina Trail on Catalina Island or if it’s just an overnight backpacking trip in a national forest.
Step 1: Figure Out Where You Want To Go
When trying to choose a destination for an upcoming overnight backpacking trip, I get inspiration from all kinds of sources like watching YouTube videos, word of mouth from a friend who went there and told me about it, Facebook Groups, social media and local guidebooks for specific areas.
Step 2: Do Your Research
I start by doing a Google search using keywords to help figure out destinations of where I might want to go. I’ll look for online trip planning guides to get a general idea of routes in the area and trips other people have done.
I’ll also pull up information from the land management agency to get an idea of what the rules and regulations are for the area. For example, if I’m thinking about doing a backpacking trip in a national park, I’ll look up the NPS website to get more details.
If you’re not sure who the land management agency is for the area you’re looking to plan your trip to, you can always look at a paper map or use an online navigation tool like onX Backcountry to figure out who the land management agency is for the area.
While doing my research, I’m also asking myself questions like:
- Do I need permits or reservations for the area?
- How do I get to the trailhead? Do I need to take a ferry?
- What’s the weather going to be like?
- What are the current trail conditions for the area?
- What type of backpacking gear will I need?
- How much food will I need to bring?
- What are the regulations for food storage? Do I need a hard sided bear canister or are there metal bear boxes I can keep my food in while at camp?
- And what kind of wildlife can I expect to see in the area?
Step 3: Put Together an Itinerary
Once I’ve done my research, step three is to put together an itinerary for my trip. This is when I figure out how many days I want to be out there and what day I want to start and finish my trip.
This is also when I determine how many miles I want to hike each day, get an idea of where I want to camp and start figuring out where the water sources are. I also book any reservations I might need for my trip like getting a backcountry permit (we didn’t need one for this trip), booking campsites in town (because we did this trip early season, all of the campsites in town were free and first come, first served) and make reservations for the ferry since we’d need to take the ferry to get to and from the trailhead.
My Favorite Backpacking Trip Planning Resources
I personally love using onX Backcountry as my primary trip planning tool to help me figure out trip logistics before getting out on trail. I use onX Backcountry to:
- Create a trip itinerary
- Create daily routes for each day I’m out on trail
- Get permit info
- Find campsites and water sources
- And get an idea of what the current trail conditions are going to be like
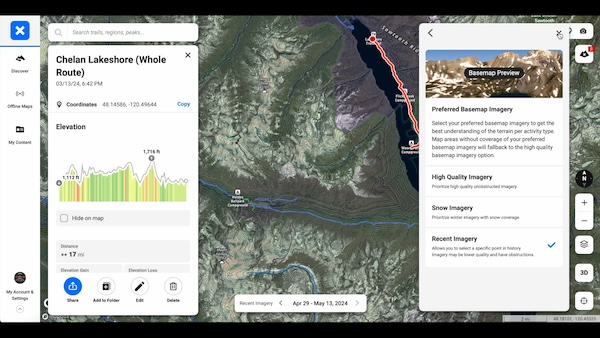
To find out what the current trail conditions are, like if there will be snow on trail, you’ll want to check out onX Backcountry’s Recent Imagery feature, which is only available to Elite members. To see what current trail conditions are for any given area, click on Layer Options and right under Basemaps, click on Preferred Basemap Imagery and select Recent Imagery. This will give you a high-resolution satellite imagery of the area, showing what’s covered in snow and what’s not covered in snow. The satellite imagery on onX is updated at least every two weeks.
Then once I’m out on trail, I use onX Backcountry as my primary navigation tool to help me stay found while I’m out there and to help guide me to campsites and water sources. As long as you’ve downloaded an offline map of the area you’ll be traveling in before losing cell and WiFi service, you’ll be able to access all of the routes and waypoints you’ve created for your trip while you’re out on trail without service.
Interested in checking out onX Backcountry to help plan your next overnight backpacking trip? Get 20% off onX Backcountry OR start a free 14 day trial of onX Backcountry Elite by CLICKING HERE and using promo code “HungryHiker”.
Once I’ve figured out where I want to go, have done all of my research, put together a trip itinerary, downloaded my offline map of the area and have packed all of the backpacking gear and food I’ll need for my trip, then it’s time to go hiking.
Need help packing for your next overnight backpacking trip? Not sure what gear to pack? Download my free Backpacking Gear Packing List to help you get organized when planning your next trip.
Disclaimer: The-Hungry-Hiker.com is a participant in the Amazon Affiliate Links and AvantlInks Program, affiliate advertising programs designed to provide a means for sites to earn advertising fees by advertising and linking to Amazon.com and other affiliated sites at no cost to you. Please note, I only link to products and services I personally use and trust.