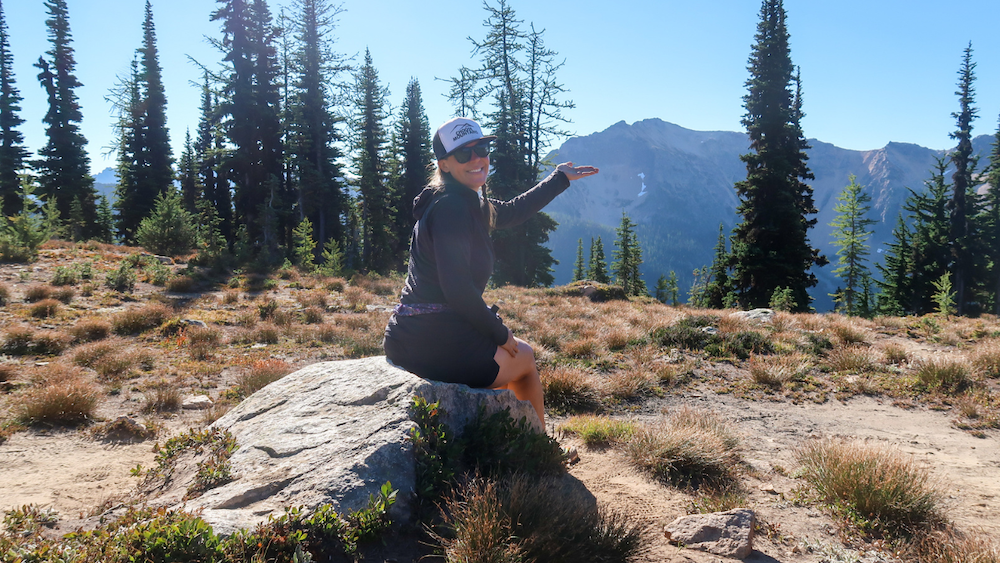
Have you been thinking about wanting to go on a solo overnight backpacking trip? Do you want to be able to go backpacking wherever you want, whenever you want without having to wait for someone else to go with? Maybe you’re tired of having to keep up with someone else on trail and want to go at your own pace.
Then it’s time to get out of your own way and give solo backpacking a try.
I’m going to share with you, step-by-step, how to prepare for your first solo backpacking trip, including how to research and plan your solo trip out in the backcountry and important advice for first time solo backpackers.
Over the last several years and a few thousand miles, I’ve spent a fair amount of time out on trail by myself – everything from day hiking to thru-hiking the Pacific Crest Trail solo.
I went from being tired of waiting for someone to go backpacking with and being scared of being out on trail alone to planning multi-day, solo backpacking trips like thru-hiking the PCT, hiking the Grand Canyon Rim to Rim to Rim trail and section hiking multiple sections of the PCT here in Washington by myself so that I could spend more time in the backcountry without having to wait for someone else to go with me. Over the years, I’ve come to really embrace and love solo backpacking.

There are so many reasons why I love solo backpacking:
- I have the freedom to go wherever I want to, whenever I want to without waiting for someone to go with me
- I get to hike at my own pace
- I can challenge myself if I want to
- Solo trips in the backcountry are always an opportunity to learn about more myself and enjoy my “me” time on trail
- When I’m out on trail by myself, I get to think things through in my head without any distractions
- I get to prove to myself I can do anything I set my mind to and overcome any challenges that come my way
- Solo backpacking is empowering. It’s a huge sense of accomplishment, an incredible boost of self-confidence and it’s really addicting
- Solo travel in the backcountry, whether it’s thru-hiking, section hiking or a weekend, overnight backpacking has ruined my life in the best way possible
Prepare
Baby Steps
Start small – No one says you have to go on a big trip for a bunch of days and hike a ton of miles for your first trip. Start small. Start with a single, easy overnight trip, which will mean you’ll need less food and clothing, making packing easy and will help your pack organization pretty simple. The goal of this first trip is to gain experience and increase your confidence so that you’ll want to go on your next trip.
Pick a familiar trail, somewhere you’ve been before
By going someplace you’re familiar with and have gone before, you help eliminate the fear of the unknown, making the whole idea of doing your first solo backpacking trip way less scary.
Keep it Short
Choose something with a round-trip distance of 10 miles or less. Ideally, try to get at least 3 to 5 miles away from the trailhead. This way, you’ll get far enough out there to enjoy yourself, get away from city life and feel accomplished while keeping the overall level of risk pretty low.
Choose a fairly popular, well-marked, regularly maintained and easy to follow trail
Even though you’re getting on trail alone, you won’t feel all alone if you’re out on a popular, well-travelled trail. There will more than likely be other hikers and backpackers out on trail with you. If you really want to make sure that there will be other people out on trail with you, consider planning your first solo backpacking trip over the weekend when there’s likely to be more people out on trail.
Know your limits
Be honest with yourself about your skills and capabilities. Since you’re probably not sure what you’re capable of yet, you’ll want to start small, keep it short and stay closer to home instead of picking a super remote location and hike a bunch of miles for your first solo backpacking trip. This way, if things go sideways or you don’t feel safe, you have the option to pack up camp and hike back to the trailhead. If you do end up packing up camp and heading back to the trailhead earlier than you anticipated, it’s nothing to be ashamed about. The goal here is to set realistic expectations for your first solo backpacking trip so that your chance for having a successful trip is much higher.
Gear
Pack the right gear for the right conditions and terrain. When you pack the right gear, you’ll enjoy yourself out on trail while being safe.
When packing for your backpacking trip, whether it’s your first solo trip or your next, you’ll want to make sure you have the following systems with you:
- Water to start with. Note where the first water source is out on trail on your map so that you can figure out how much water you’ll need to start your trip with.
- A Pack
- Shelter system
- Sleeping system
- Clothes and shoes to hike in and extra clothes to pack for insulation in case you hit bad weather
- Cooking system and Food Storage
- Water filtration system
- Repair/tool/toiletry kit
- Poop kit
- First aid kit
- Electronics like your smartphone, a camera or even a satellite messenger and a way to charge the electronics you bring with you when out on trail
- Misc and seasonal gear, which will all depend on you trip objective and where and when you go for your backpacking trip. This can include microspikes, ice axe, gaiters, an umbrella, bug spray/bug net, rain gear, etc.
You’ll also want to make sure you pack the 10 Essentials.
Why is packing the 10 Essentials important for any trip out in the backcountry? Having the 10 Essentials will help better prepare you for the worst-case scenario, just in case you have to spend more time out on trail than you originally anticipated.
The 10 Essentials include:
- Navigation
- Illumination
- Shelter
- Extra Water
- Extra Food
- Extra Clothes
- Sun Protection
- Fire
- Knife/Gear Repair
- First Aid Kit
To learn more details about what the 10 Essentials are and why they’re so important to have with you in your pack, whether you’re going on a day hike or overnight backpacking trip, check out my video, “What are the 10 Essentials? Hiking Essentials for Hikers & Backpackers”
Safety Tips When It Comes To Gear
 Consider carrying a Personal Locator Beacon (PLB) or a satellite messenger, in the event of an emergency and for peace of mind for both you and your friends and family at home. Both devices are designed to send out an emergency signal once triggered, when you’re out in the mountains, outside of cell service range.
I bring my Garmin inReach with me on every one of my backpacking trips. Having a satellite messenger like the Garmin inReach allows me to have two-way messaging in the form of a text message with local Search and Rescue if in an emergency situation as well as be able to stay in touch with friends and family at home, giving everyone peace of mind while I’m out on trail for my solo adventures.
Get to know your gear BEFORE getting out on trail:
- Practice using your gear
- Know how to use all of your gear, including learning how to set up your tent, lighting your stove and filtering water
- Practice packing and unpacking your pack
- Practice wearing your pack with all of your gear, food and water before getting on trail
Research
Figure out where you want to go
Guidebooks
- Guidebooks can be a great reference for wanting to check out a specific area, park, state or country
- Often times guidebooks will be loaded with beautiful photos, maps and intel on the area
- Find an area you want to explore and collect a couple of current guidebooks featuring that area
Hiking/Backpacking/Outdoor-Related Facebook Groups
- If you’re on Facebook, do a search for hiking and backpacking groups. There are tons of groups out there. Some are more general hiking and backpacking focused. There are also location-specific hiking and backpacking groups, trail specific groups (especially for the long-distance trails) and even women-specific hiking and backpacking groups. You can even find solo female hiker and backpacker groups.
- I highly recommend saving posts as you come across them in these groups of places you want to explore in the future so you can refer back to them on down the line when planning your trip
Local trail associations
- American Trails has a complete list of state trail associations all across the country, listed by state on their website. Check out the link below. For example, if you’re located in Washington State, the Washington Trails Association is an incredible and free online resource for discovering trails and parks throughout the state. On their website is a Hiking Guide and a Hike Finder that is designed to help users find hiking and backpacking trails throughout the state.
- Call and/or email the local ranger station for the area you want to travel in
- Visit the National Park’s website – Park websites are great resources when researching permits and rules and regulations within a specific park
Become familiar with local rules and regulations for the area you’ll be visiting
- Do you need a permit to camp?
- Are there designated tentsites or is dispersed camping allowed?
- What are the requirements for food storage: hard-side bear canister vs food bag/bear hangs?
- What are the requirements for waste management? Can you bury your poop or do you have to pack it out in a wag bag?
- Will you need a parking pass for your car at the trailhead?
- Is there a Park fee required to get into the area?
- Is there a fire ban?
Research trail conditions and check the weather forecast (read trip reports)
- Read recent trip reports/current trail conditions
- Check road conditions
- Check weather forecast for where you plan on heading to – NOAA
Make sure you’re familiar with LNT Principles
- Plan ahead and prepare – Just like what we’re doing now!
- Travel and camp on durable surfaces
- Dispose of waste properly, which ultimately means Pack it on, pack it out
- Leave what you find
- Minimize campfire impacts
- Respect wildlife, like keeping your distance and being bear aware
- Be considerate of other visitors
Plan
Create a route using either a paper map or a GPS app system like the Gaia GPS
- Download maps and/or your route before getting on trail and out of cell service
- Mark possible tentsites
- Mark possible water sources along the trail
- Note landmarks
Build Your Trip Itinerary
Your itinerary should include:
- Your planned route and the name of the trailhead you’ll be starting from
- Note the potential tentsites you may stay at during your trip
- Your start date and time. Let your emergency contact know when you’re leaving
- Your expected end date and time. Let your emergency contact know when you come back
- Establish a clear time that you will be in touch with your emergency contact at the end of your trip
- The name of phone number of your emergency contact
- The day and time of when you’ll notify your emergency contact of your return
- The make, model, color and license plate number of your car and the location of where you parked your car
- The name of the county you’ll be traveling in
- Information on how to contact local authorities including local county search and rescue, local sheriff’s office and the local ranger station
- Permission for your emergency contact to alert authorities if you don’t return within set timeframe of your anticipated return day/time
Leave your trip itinerary with someone at home whom you trust
~~~
Important Advice For First Time Solo Backpackers
Now that we’ve gone over how to prepare, research and plan your first solo backpacking trip, let’s go over some important advice for first time solo backpackers:
- Try a few nights of solo car camping in an established, drive-up campsite first
- Always trust your gut
- Stay calm and take deep breaths
- Pack distractions – a book, a Kindle, music, podcasts, your journal, download movies/tv shows or a game to play (if hiking or camping by yourself at night, play music out loud to keep the animals away)
- Be vague with your solo camping plans when talking to strangers on trail. Keep your camping destination private when out on trail and don’t point out the fact that you’re alone. Lie if you feel uncomfortable.
- Camp at a tentsite with other backpackers and/or near natural running water for a good night’s sleep
- Give Yourself Some Grace – Practice, practice, practice!
- If things go sideways or you don’t feel safe, hike back to your car. Don’t feel ashamed for turning back around if you feel unsafe or unprepared
- Find inspiration from other solo backpackers – connect either in-person or online to get advice, resources and suggestions on how to prepare for your trip
Ladies, have you been thinking about wanting to go on a solo day hike or overnight backpacking trip this year? Do you want to feel more comfortable, confident and self-reliant for your solo adventures in the backcountry? If so, I have something special for you!
I’ve created The Confident Solo Female Backpacker System
Whether you’re a beginner or a well-seasoned female backpacker, this comprehensive, self-paced online backpacking program specifically for women will walk you through, step by step, everything you need to know in order to plan, prepare and build up your confidence to comfortably go on either your FIRST or NEXT solo backpacking trip.
Ladies, I’d love to work with you to help you achieve your solo hiking and backpacking goals!
Interested in learning more about the program I’ve put together and how I can help you achieve your hiking and backpacking goals this year? Sign up for a free, one-on-one Zoom call to chat with me and see if you’d be a perfect fit for this program. CLICK HERE for more details.
Disclaimer: The-Hungry-Hiker.com is a participant in the Amazon Affiliate Links and AvantlInks Program, affiliate advertising programs designed to provide a means for sites to earn advertising fees by advertising and linking to Amazon.com and other affiliated sites at no cost to you. Please note, I only link to products and services I personally use and trust.

1 Comment on How to Prepare for Your First Solo Backpacking Trip